Replace and swap elements on the canvas
Use replace rules to control how elements swap when customers add new images or graphics to the canvas.
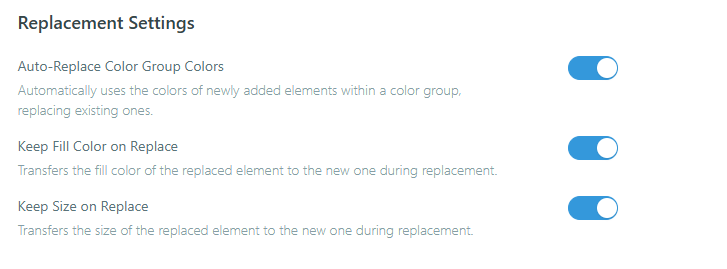
The replace feature controls how elements swap on the canvas. When a customer adds a new element that shares a replace name with an existing one, the old element is automatically removed. This keeps designs clean and prevents customers from stacking too many elements.
Before you start
- You have created a product with at least one view.
- You have access to the Product Builder (Chamevo > Products in your WordPress admin).
How replace works
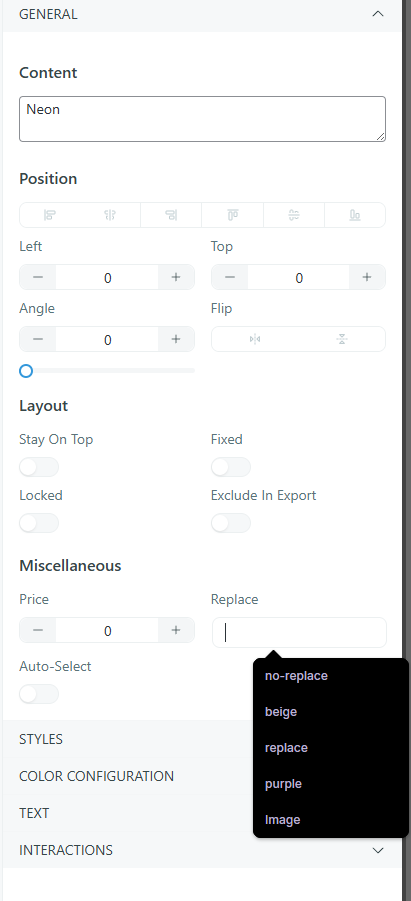
Every element has a Replace field in its properties. Enter a text label you define. When a customer adds a new element with the same replace label, it replaces the existing one. Only one element per replace label can exist at a time.
Common use cases:
- Logo placeholder — place a logo image with a replace name like "logo". When the customer uploads their own logo, it replaces yours.
- Single design from a category — set the same replace name on a graphics category. Customers can browse and pick one design. Adding a second one swaps out the first.
- Multi-view consistency — enable Replace In All Views so that replacing an element on the front also replaces the matching element on the back.
Steps
Set up a replaceable element
- Open your product in the Product Builder (Chamevo > Products).
- Select the element you want to make replaceable (an image, graphic, or text element).
- In the properties panel, find the Replace field under the Miscellaneous section.
- Enter a unique replace name (for example, "logo" or "design").
- Click Save View.
Any new element added with the same replace name now swaps out this one.
Set replace on a graphics category
To make an entire graphics category replaceable (so customers can only pick one graphic at a time):