Preparing the latest guides, releases, and feature request updates.
Loading guides
Preparing the right Knowledge Base content for this platform.
Set up print profiles for your production workflow | Chamevo Support Center
Set up print profiles for your production workflow
Create print profiles to control file uploads, element behavior, color options, and module availability across products, views, and print areas.
Updated April 28, 20265 min read
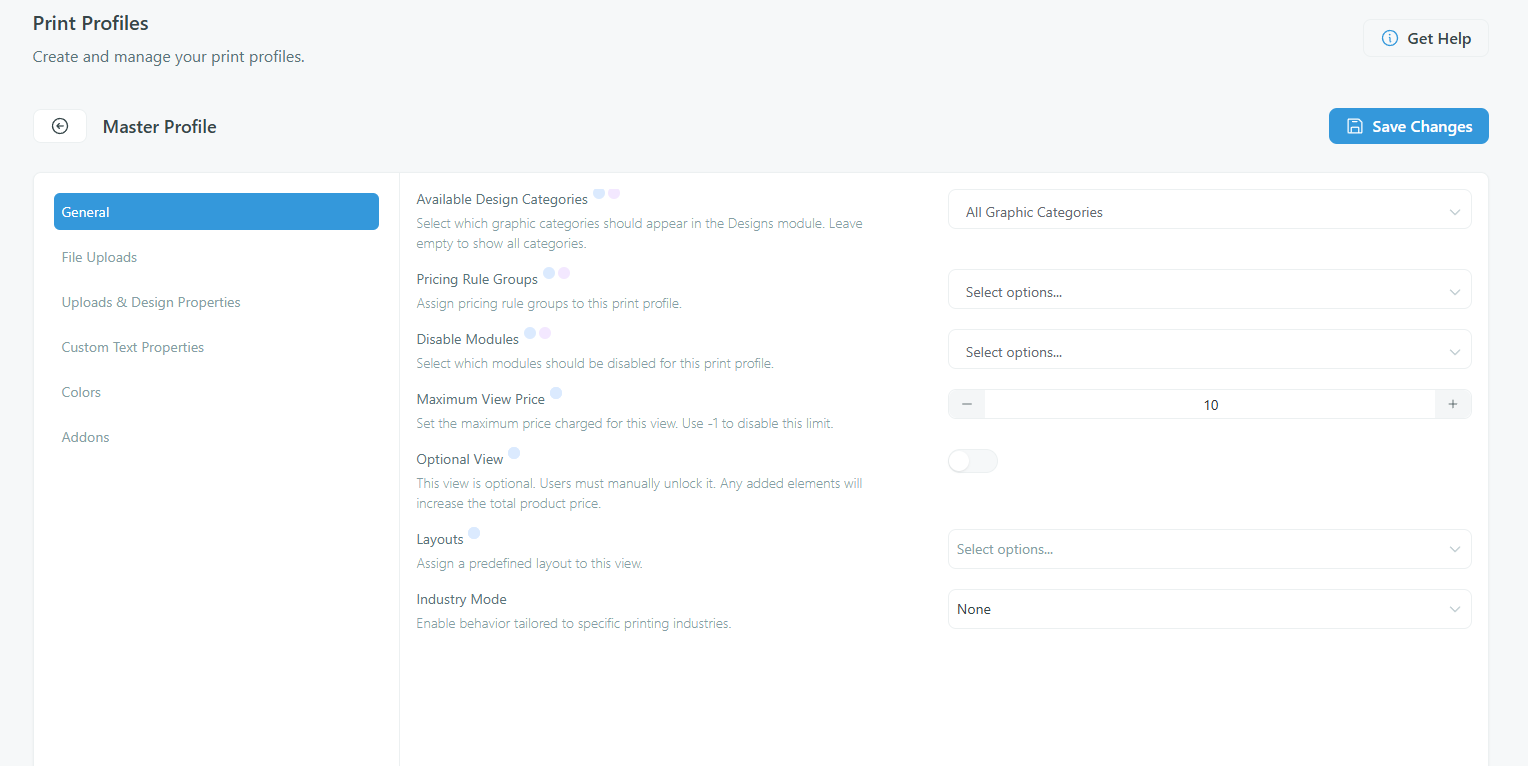
Print profiles control what customers can do in the product customizer: which file types they upload, how elements behave, which colors are available, and which modules appear. Create different profiles for different product types and assign them at the product, view, or print area level.
Before you start
You have access to your WordPress admin.
You have at least one product created in Chamevo > Products.
How print profiles work
Every Chamevo installation has a Master Print Profile. This profile sets the default behavior for all products. You cannot delete the Master Print Profile.
You can create additional profiles to override the Master for specific products. Settings cascade through four levels:
Master Print Profile — default for all products
Product — overrides the Master for that product
View — overrides the product-level profile for that view (front, back, etc.)
Print area — overrides the view-level profile for that print area
A setting at a lower level always overrides the same setting at a higher level. If you set Minimum DPI to 150 in the Master and 300 in a product-level profile, that product uses 300 DPI.
Steps
Edit the Master Print Profile
Go to Chamevo > Print Profiles.
Click Edit Master Profile.
Configure settings across the six tabs (see below).
Click Save Changes.
The Master Print Profile includes some settings that only appear at the Master level: All Images Colors, All Texts Colors, Stroke Colors, and Patterns in the Color Configurations tab.
Create a new print profile
Go to Chamevo > Print Profiles.
Click Add Profile.
Enter a name (for example, "Apparel" or "Business Cards").
Positioning: Auto-Center (on by default), Left, Top, Layer Depth, Replace, Replace In All Views.
Interactions: Draggable, Rotatable, Resizable (all on by default), Layer Depth Changeable, Auto-Select, Stay On Top, Allow Unproportional Scaling.
Styles & Content: Font Size (default 18), Minimum/Maximum Font Size, Font Size To Width, Font Family, Control Padding, Alignment (Left/Center/Right), Maximum Characters, Maximum Lines, Text Link Group, and text curving settings (Curvable, Reverse, Spacing, Radius, Max. Radius).
Bounding Box: Constrain text to a defined area using coordinates or another element as a reference.
Advanced: Price per text element.
Color Configurations
Controls color options across four sections:
Section
What it controls
Master only?
Uploads & Designs
Fill colors and color link group for uploaded/added designs
No
All Images
Fill colors and color link group for all image elements
Yes
Custom Texts
Fill colors, default color, and color link group for customer text
No
All Texts
Fill colors, stroke colors, and patterns for all text elements
Yes
Enter colors as hex values (e.g. #000000,#ffffff). Leave empty to show the color wheel.
Addons
Configures optional module settings:
Dynamic Views — Price per cm², predefined formats, min/max width and height
Names & Numbers — Dropdown values, item price per entry
Bulk Variations — Available options in Size=M|L;Color=Red|Blue format
View and print area indicators
Settings marked with a blue dot can be overridden at the view level. Settings marked with a purple dot can be overridden at the print area level. The profile editor shows these indicators next to each applicable setting.
Check your setup
Go to Chamevo > Print Profiles. Confirm the Master Print Profile has your default settings.
Open a product in the Product Builder. Confirm a print profile is assigned.
Launch the product customizer on your store. Verify that modules, file types, and color options match your profile configuration.
Troubleshooting
Changes do not appear in the product customizer. Confirm you clicked Save Changes in the profile editor and Save View in the Product Builder. Clear your browser cache.
A setting appears in the Master but not in a custom profile. Some settings (All Images Colors, All Texts Colors, Stroke Colors, Patterns) exist only in the Master Print Profile. These apply globally and cannot be overridden per profile.
Custom profile does not override the Master. Confirm the profile is assigned to the product, view, or print area in the Product Builder under Print Settings.
Q: What is the difference between the Master Print Profile and a custom profile?
A: The Master sets defaults for all products. A custom profile overrides specific settings for assigned products, views, or print areas. Some color and pattern settings exist only in the Master.
Q: Can I assign different profiles to different views of the same product?
A: Yes. In the Product Builder, open Print Settings and select a profile for each view or print area independently.
Q: Do I need to configure every setting in a custom profile?
A: No. Only change the settings you want to override. Everything else inherits from the Master Print Profile.
Q: How many print profiles can I create?
A: There is no limit. Create as many profiles as your product types require.