Create pricing rules for print area coverage
Set up pricing rules that charge customers based on how much of the print area their design covers, and learn how to price uploaded images.
Use Print Area Coverage to charge based on how much of the print area a customer's design fills. This is the right lever for production methods where larger designs cost more — embroidery, screen printing, or DTF transfers.
If you want to charge a flat fee whenever a customer uploads an image, that is handled separately as a fixed image element price. See Set prices for individual design elements.
Before you start
- You need access to Chamevo → Pricing Rules in your WordPress admin.
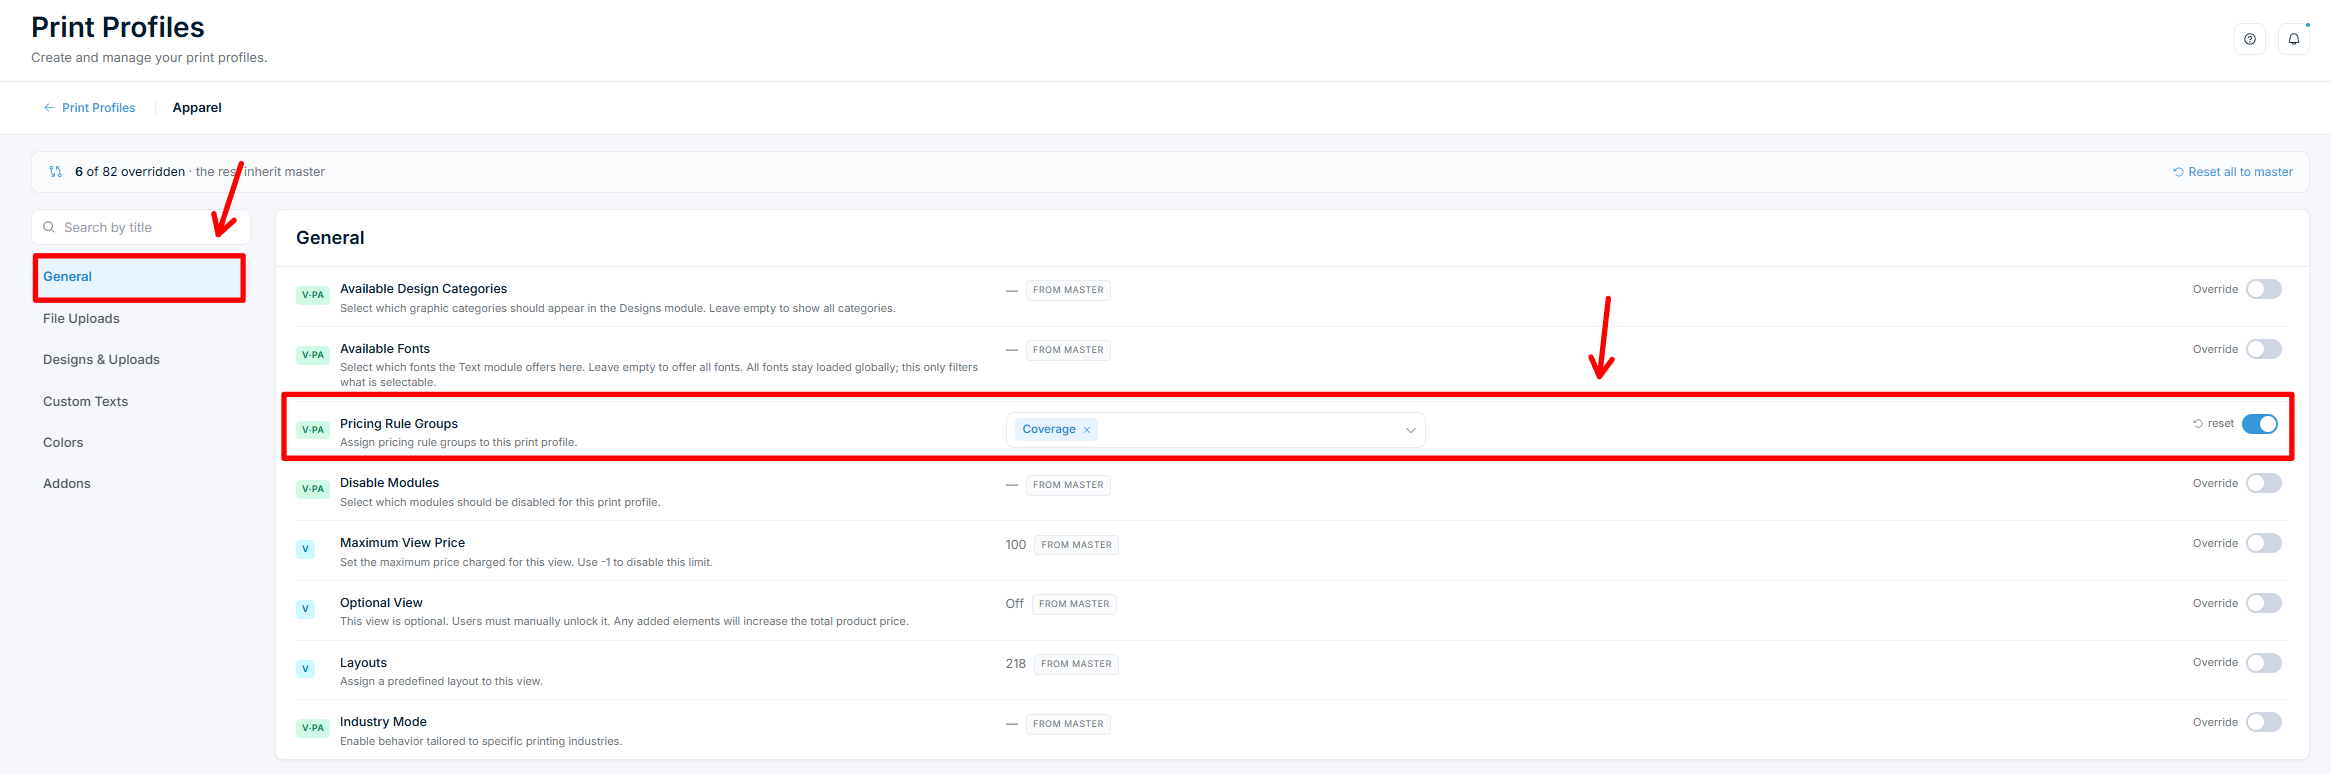
- Your product must use a Print Profile. Pricing groups are assigned through Print Profiles.
- Dynamic Pricing requires a Growth plan or above.
What Print Area Coverage measures
| Property | What it measures | Value format |
|---|---|---|
| Print Area Coverage | Percentage of the print area covered by the design | 0 to 100 (unit: %) |
Coverage applies to the whole print area, not to specific elements. Because of this, its Applies to target is fixed at Whole design — you do not pick individual elements for a coverage rule.
Create a Print Area Coverage pricing rule
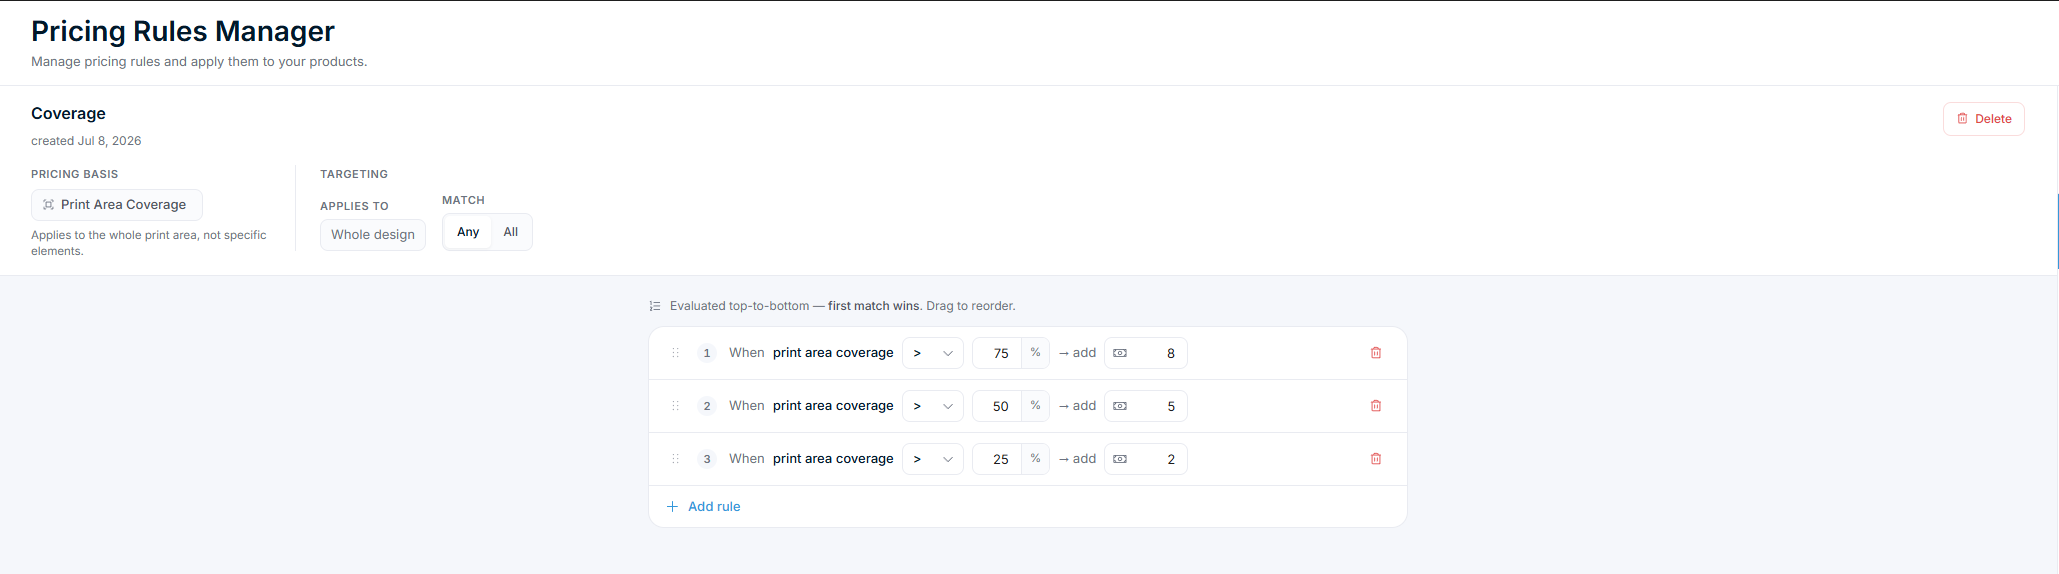
This example charges more as the design fills more of the print area.
- Go to Chamevo → Pricing Rules in your WordPress admin. This opens the Pricing Rules Manager.
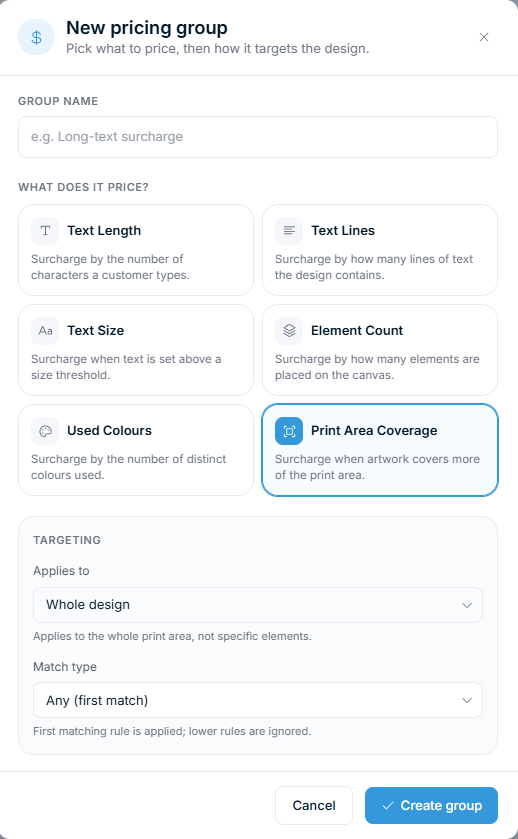
- Click New pricing group.
- In Group name, enter a title (e.g., "Coverage-based pricing").
- Under What does it price?, choose the Print Area Coverage card.
- In the Targeting section, Applies to is set to Whole design automatically. Choose a Match type — Any (first match) so the customer pays the single tier they land in.
- Click Create group.