
Set up the Chamevo MCP server
Connect Claude and other AI assistants to your Chamevo store with the @chamevo/mcp server — install nothing, configure one JSON block, and manage products, orders, and print-ready files by chat.
The Chamevo MCP server lets AI assistants like Claude work directly with your store. Once connected, you can ask your assistant to list orders, generate print-ready files, create products, update pricing rules, or change settings — without opening the WordPress admin.
The server is published on npm as @chamevo/mcp. It runs locally on your machine, speaks the Model Context Protocol (MCP) over stdio, and talks to your site through the Chamevo REST API. It exposes 70 tools across 15 domains — products, views, categories, orders, print profiles, pricing rules, fonts, settings, and more.
Before you start
- Node.js 18 or newer on the machine running your AI client. No install of the package itself is needed —
npxfetches it on demand. - A live WordPress site with the Chamevo plugin installed and active.
- Your Chamevo API token. Find it in the WordPress admin under Chamevo → Settings → General → API → API Token. The field is read-only — copy the value directly.
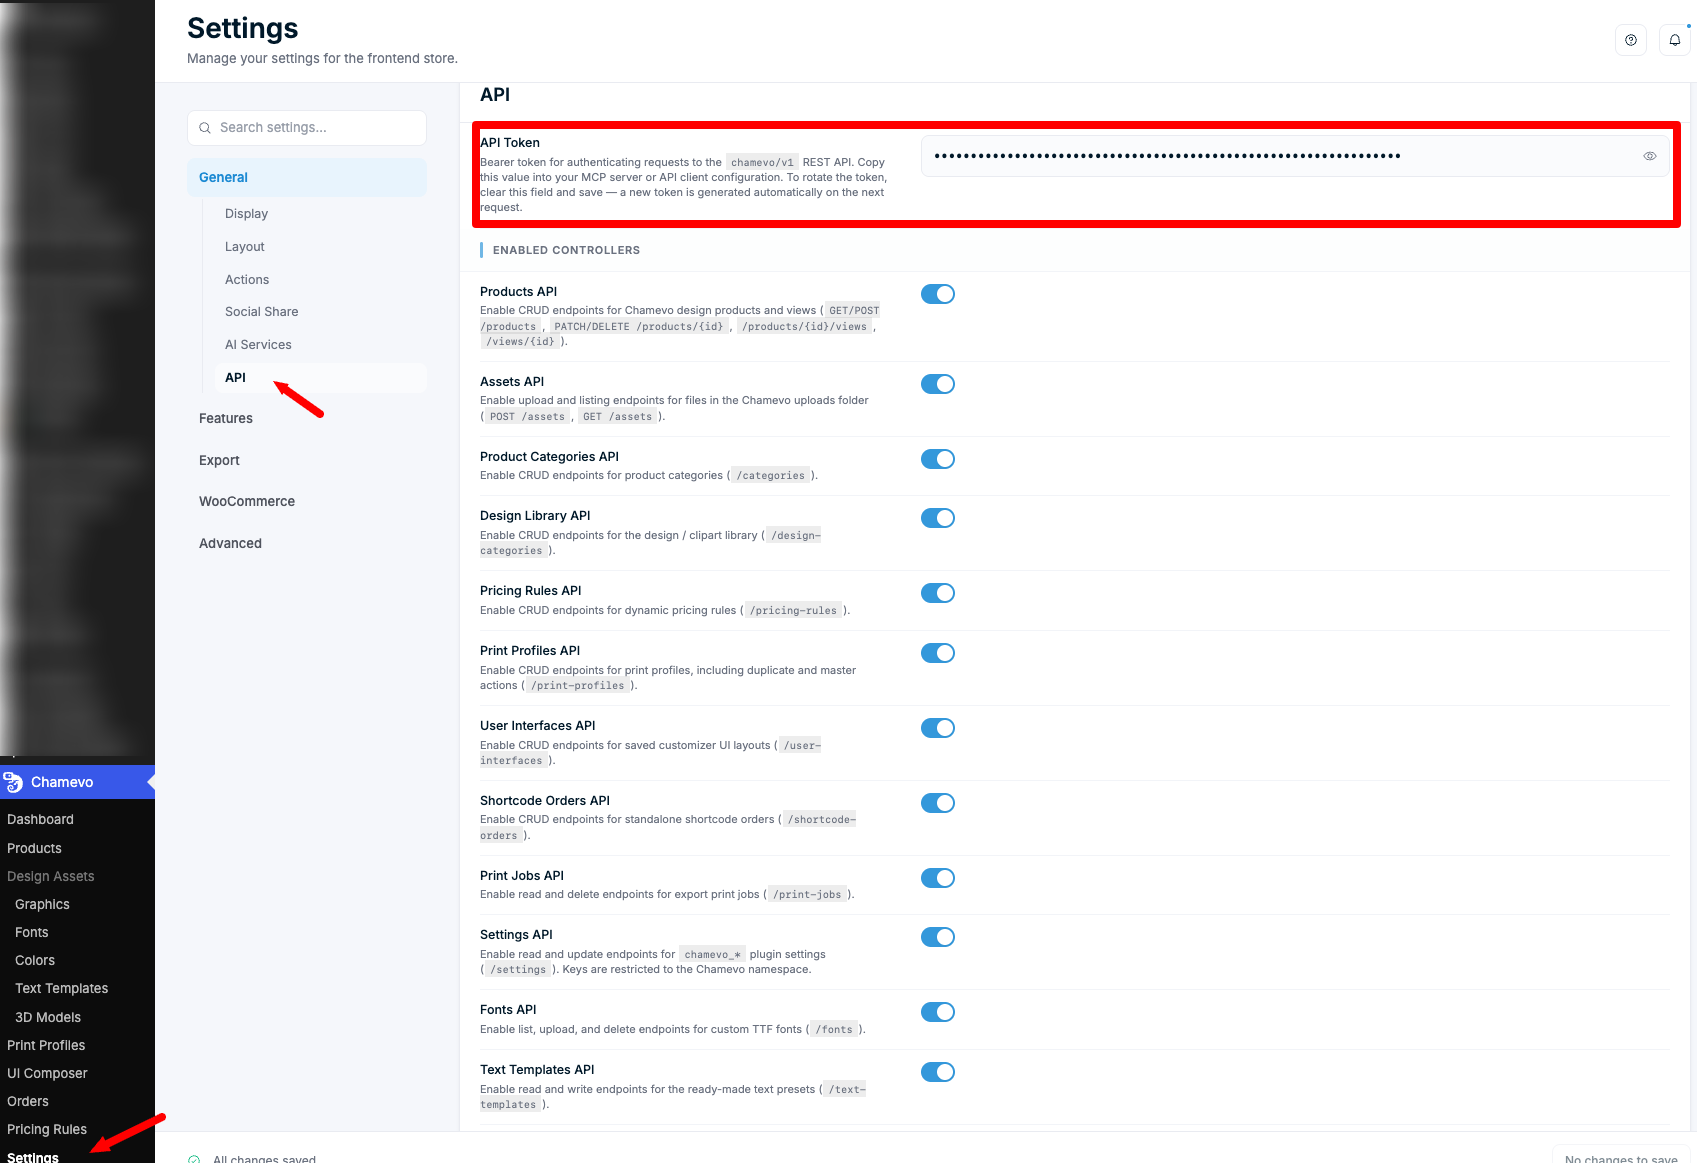
Treat the API token like a password. Anyone who has it can read and change products, orders, and settings on your site.
Steps
Connect Claude Desktop
- Open your Claude Desktop config file. On macOS it lives at
~/Library/Application Support/Claude/claude_desktop_config.json. - Add the Chamevo server block, filling in your site URL and API token:
{
  "mcpServers": {
    "chamevo": {
      "command": "npx",
      "args": ["-y", "@chamevo/mcp"],
      "env": {
        "CHAMEVO_SITE_URL": "https://your-site.com",
        "CHAMEVO_API_TOKEN": "your_token_here"
      }
    }
  }
}